Hi, I’m Nicolas_D and I joined the team about a year ago after reaching LemonHaze about the best way to get my hands on the 3D assets of Shenmue. I just wanted to be able to import the 3D models of the game in blender and try to do something with it. After a few messages, we talked about his plan to inject the whole game files in UE4 and the first thing that came in the discussion is the fact that it would be nice to remove the loadings between the different areas and have one big coherent map across all Yokosuka. This serie of posts will be about the way we stitched every maps together.
Before getting into it, you should know that all the screenshots you are going to see are from blender, so it does not represent the current look of the mod in UE4. There will be more posts coming with actual UE4 screenshots that will really bring justice to where we are now. Also, you might notice some textures misplacements, missing assets and other details that might hurt your eyes, we welcome any feedback, but keep in mind that it is a work in progress.
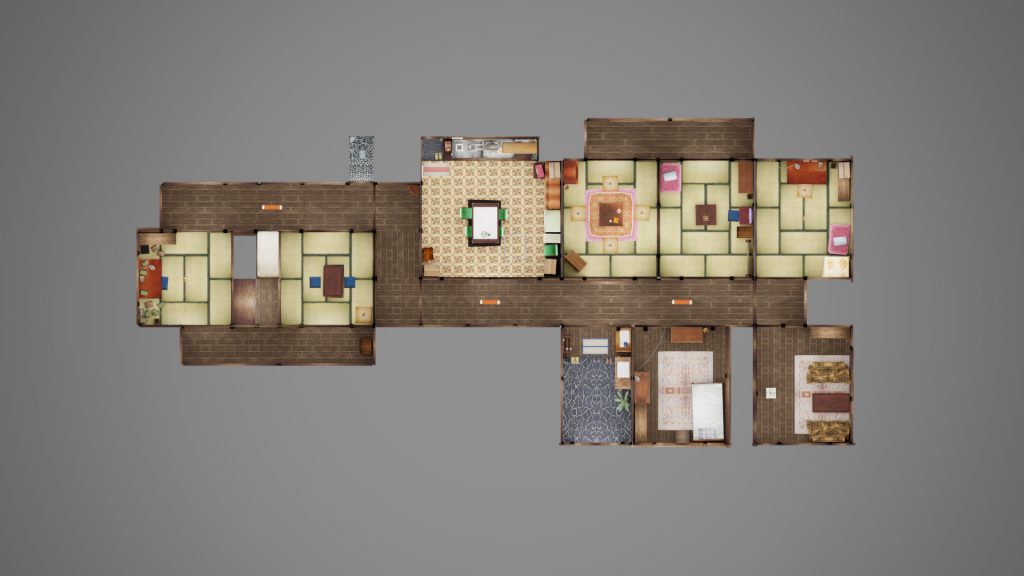
We began with the biggest piece which was the Hazuki Residence. The inside of the house was way larger than the envelope and the shape of the footprint was also different (see schema below). It is easy to notice in game that the indoor and the outdoor do not fit together just by looking at the windows. They have discrepancy in height, width and location. Modifying the indoor layout was a bit complicated given the low margin we had to change the geometry of the models without getting in a wall. So, we decided to align all the windows with the interior layout.


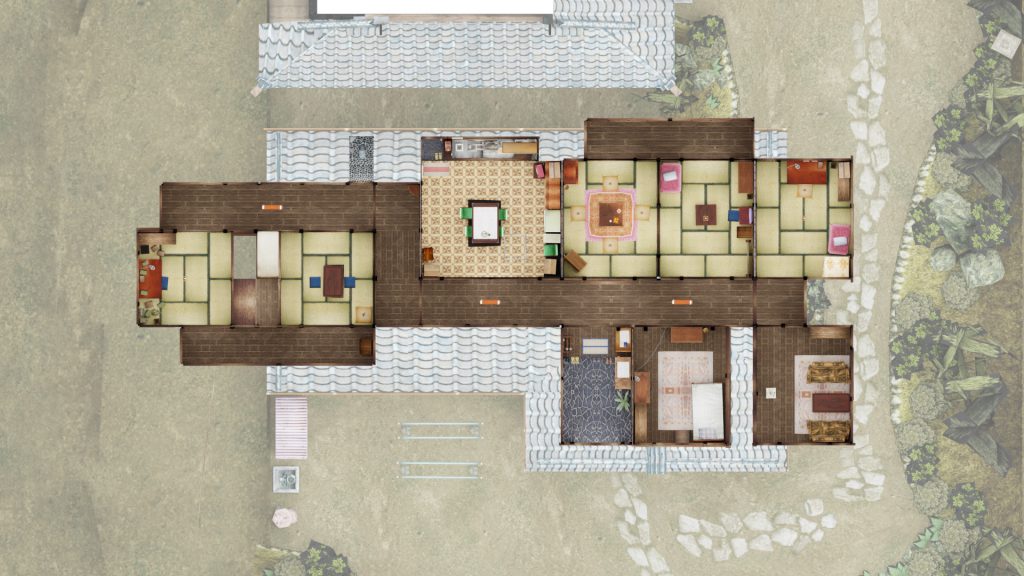
We chose that the only thing that should absolutely stay at the same location was the house’s front door. Because when you get out of the house you are directly facing the residence entrance, and, naturally, you face the house’s front door when you arrive from Yamanose. It would have felt weird to face something else and it is nice to keep the shortest path to get out of the house, given the number of times you are going to do it. So that was the first landmark.
In order to make the two maps fit together, I imported both in blender and began to look for the best way to adapt the envelope to the inside. We know that Shenmue fans spent a lot of time running around the house and that they are remarkably familiar with this location, so the objective was to make it the least noticeable possible.
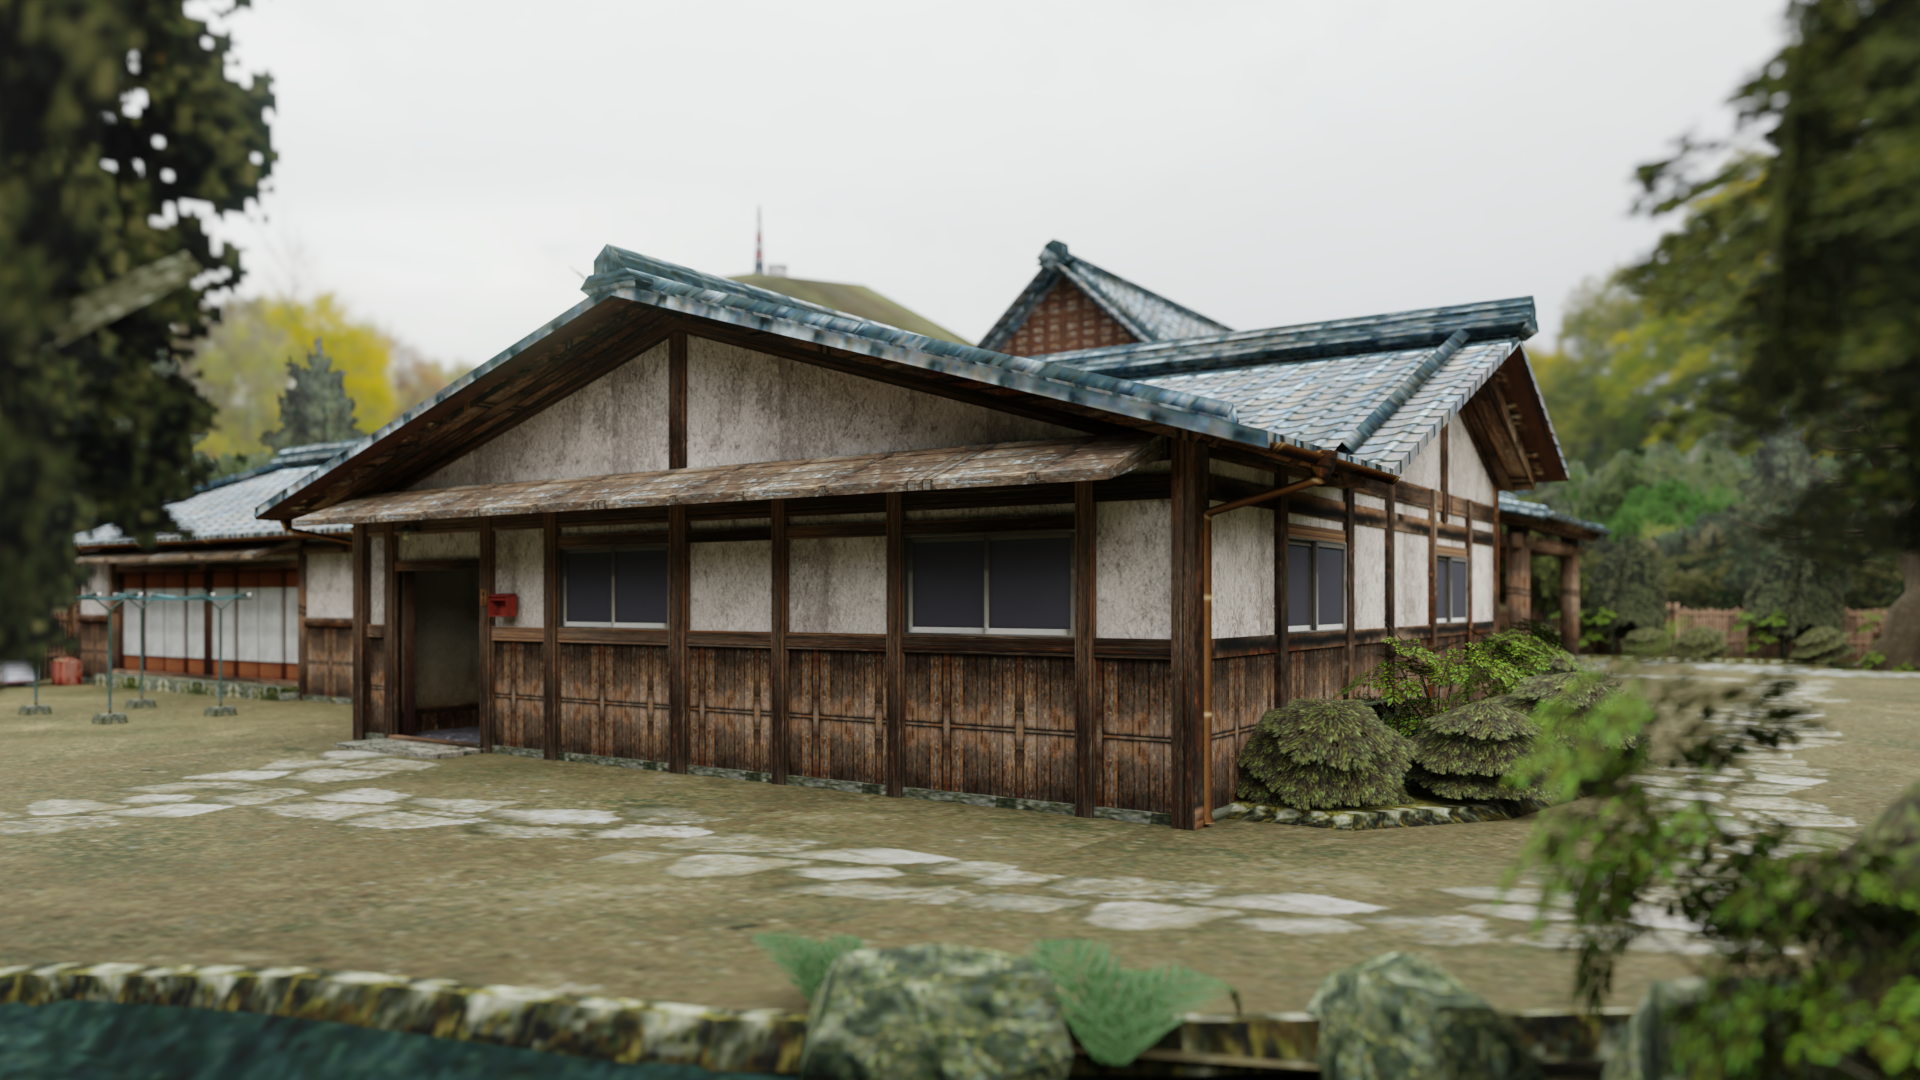
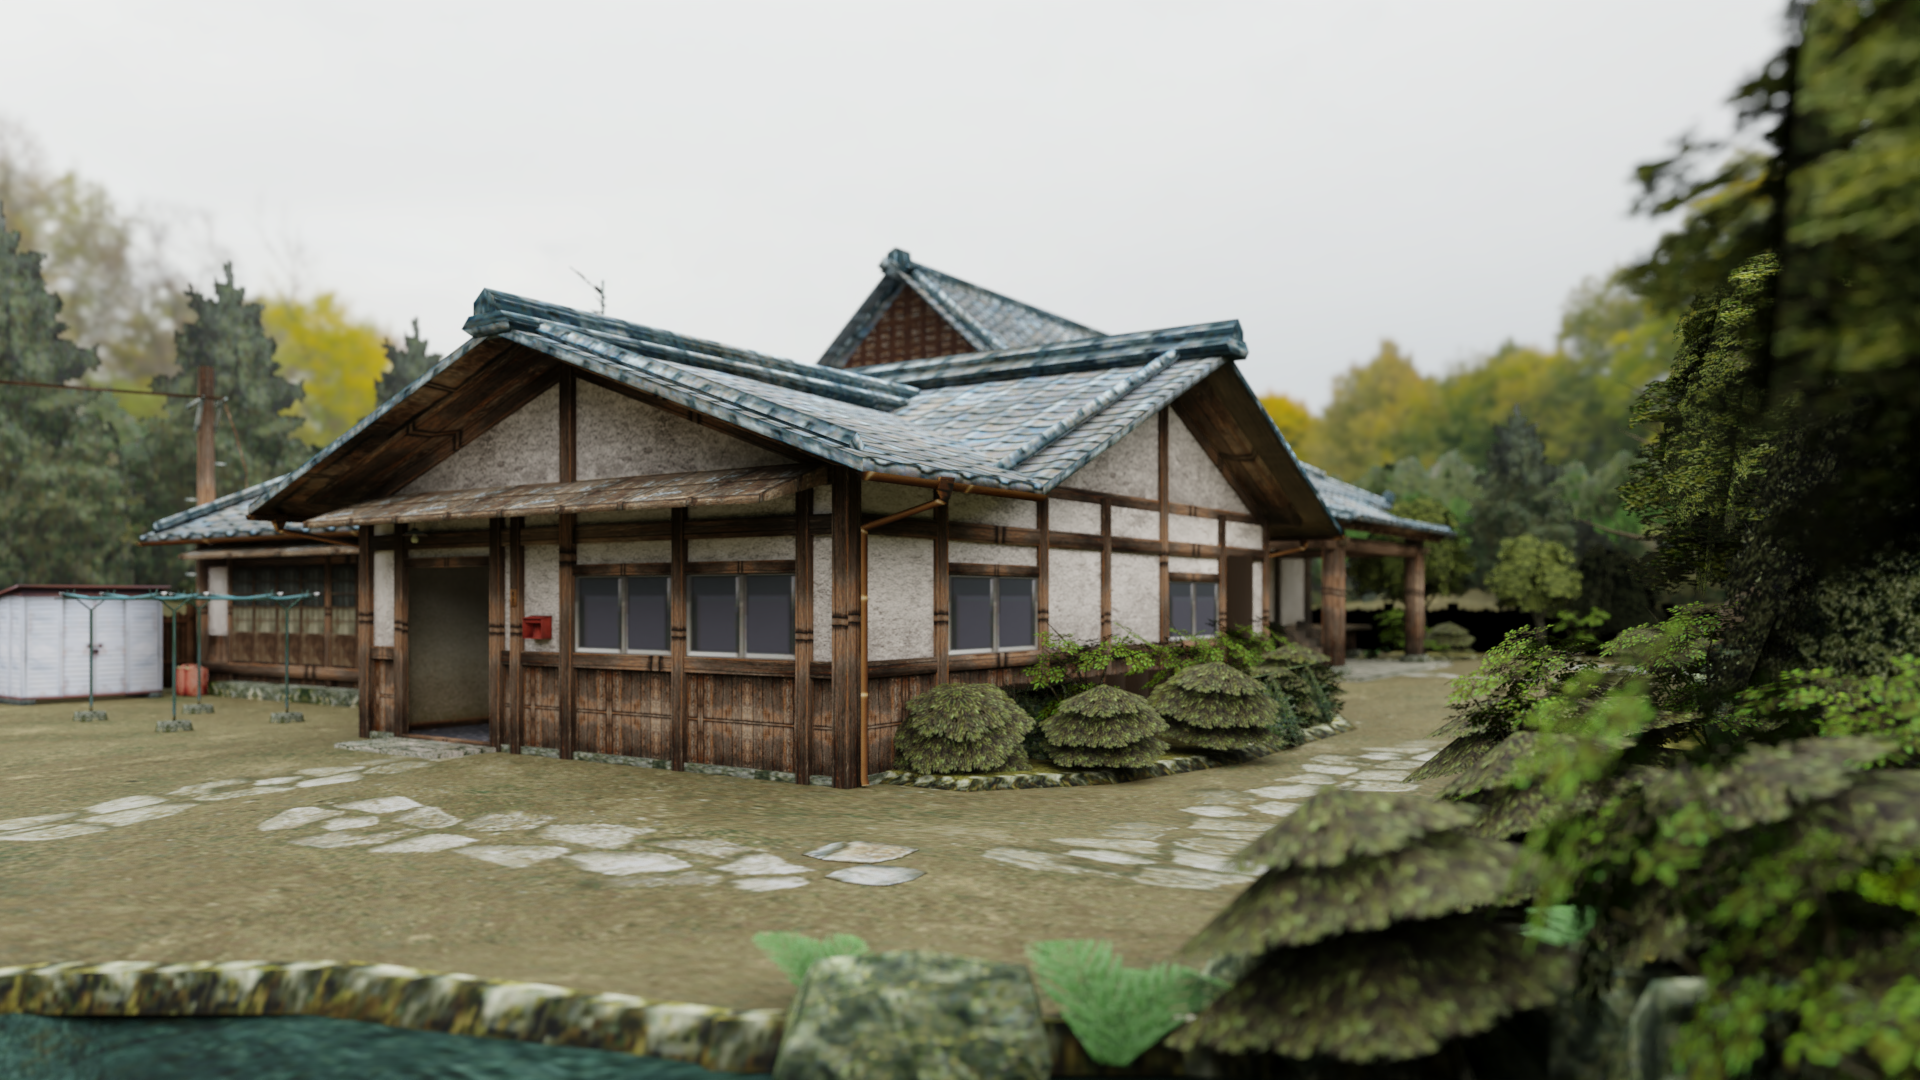
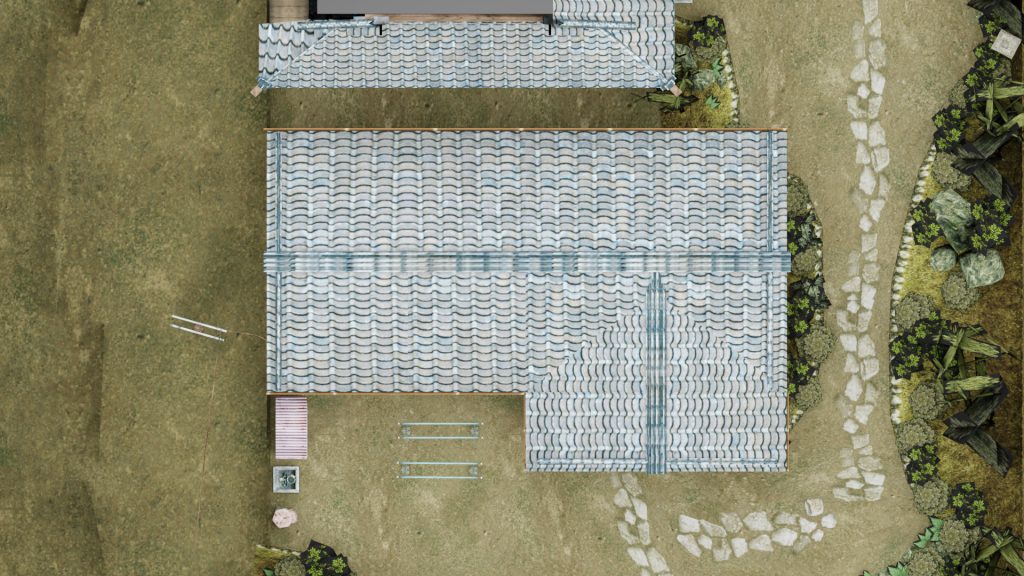
From there, I just modeled the envelope around the indoor walls, aligned the windows and doors, and adapted the roof and facades to these new dimensions. Once it was done, there come the next question. How do we adapt the environment?
We went again for the most logical way to do it. We kept the same dimension for the path and the space between the house and the dojo, stretched the ground and the surrounding flowerbeds. Then, we placed the different assets always with the same objective: making the changes the least noticeable possible.
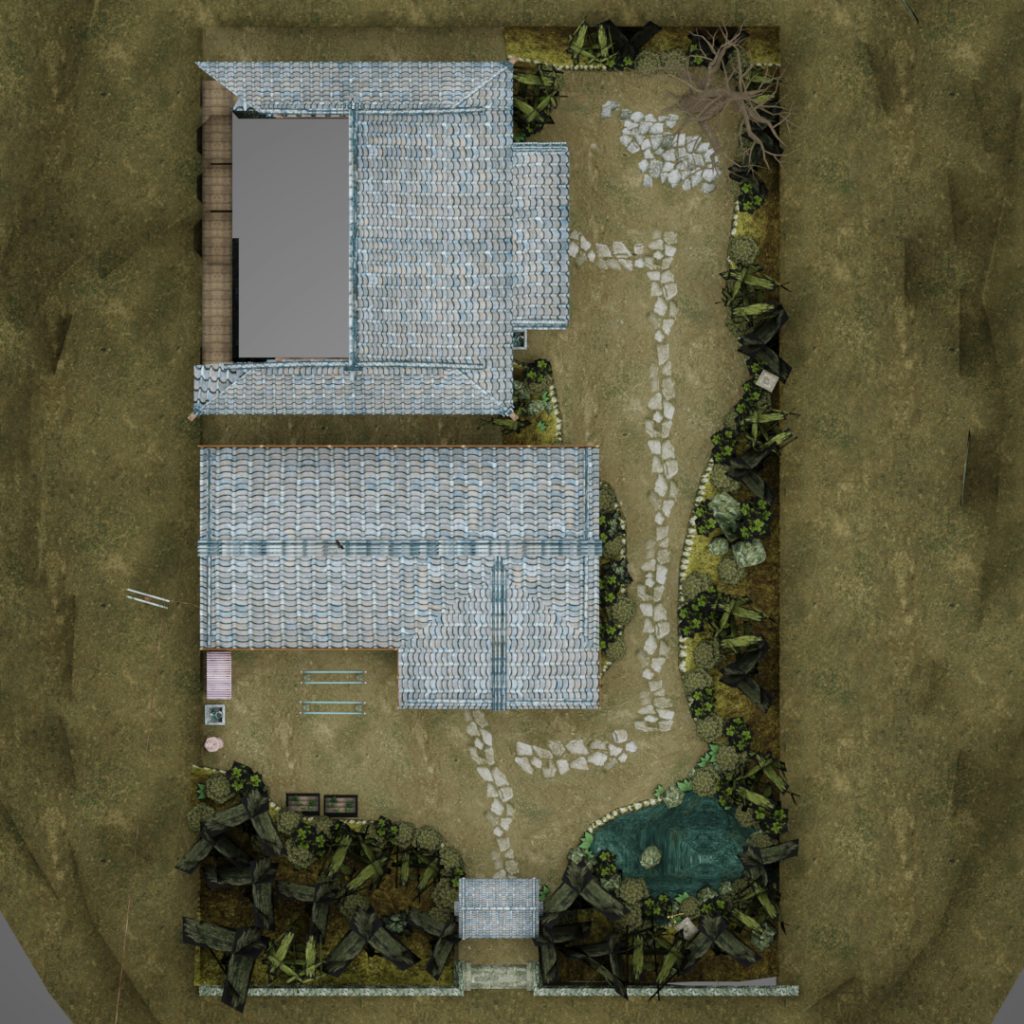
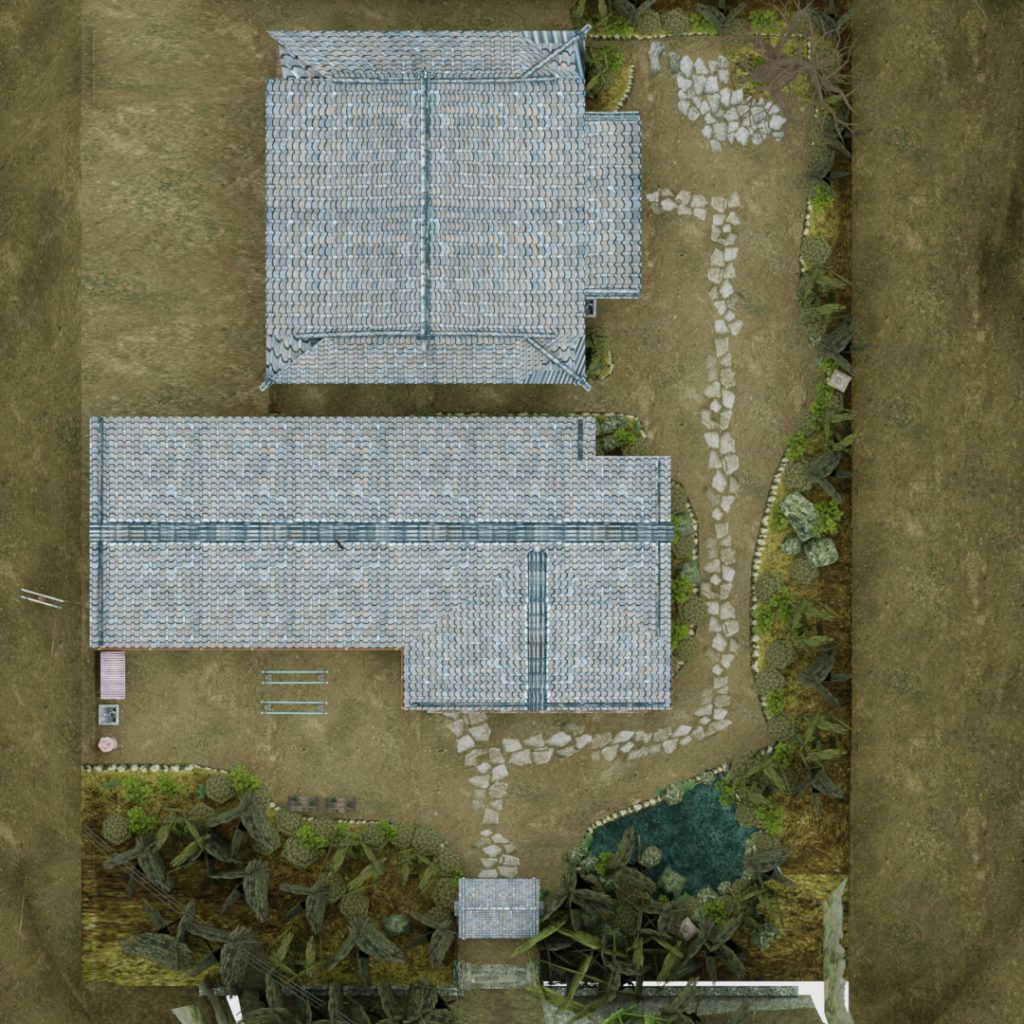
On these screenshots, you can see that the size of the map has substantially increased compared to the original. Hopefully, once you walk as Ryo around the house without a “before picture” right next to you, I believe you don’t really notice these changes. The next screenshots below should (I hope) give you a hint of what it will feel like ! You can also notice that a part of the roof of the dojo is non existant in the original. There are other examples where only the visible parts of the 3D objects are modeled. It’s obviously to save some time (why take time to model something no one will see), but more importantly, ressources. We chose to model everything, because maybe in the future, especially in the phoenix version, we could use some new camera angles and like this, we won’t be limited with missing geometry.